BAKFlip G2 Installation Guide | Complete Setup Instructions
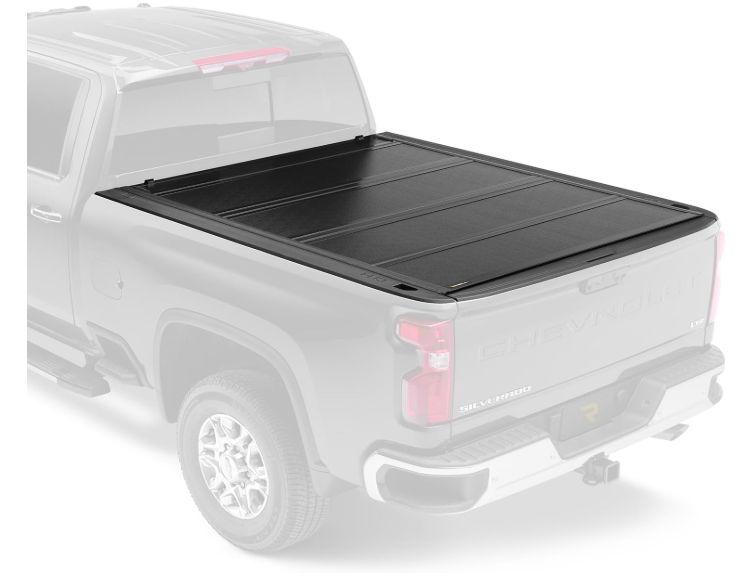
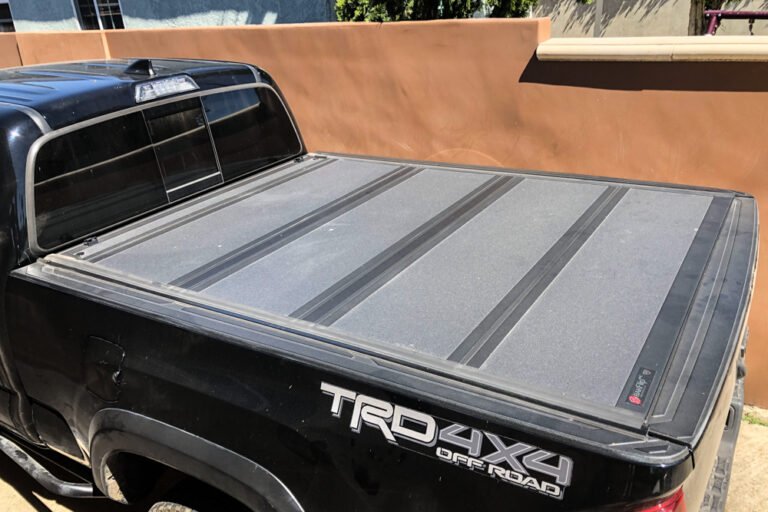
BAKFlip G2 Folding Tonneau Cover
The BAKFlip G2 represents the perfect balance of affordability and functionality with its durable aluminum construction and easy folding design. Features four-panel configuration that folds completely against the cab for full bed access. Matte black finish resists scratches and UV damage while maintaining professional appearance. Low-profile design adds minimal height to truck profile. No-drill installation on most applications preserves truck bed warranty. Compatible with F-150, Silverado, RAM 1500, Tundra, and other full-size trucks. Installation typically takes 30-45 minutes with basic hand tools.
Pre-Installation Preparation for BAKFlip G2
Successful BAKFlip G2 installation begins with proper preparation and understanding your truck’s specific requirements. Before opening the shipping carton, verify you received the correct model for your truck’s make, model, year, and bed length. The installation manual inside the box contains truck-specific instructions that supersede general guidance.
Clear your entire truck bed of cargo, toolboxes, and bed liners that might interfere with rail placement. The G2 clamps directly to your truck’s bed rails and requires unobstructed access along the entire length. Remove any aftermarket accessories like stake pocket covers or tie-down points that extend above the bed rail surface.
Inspect your truck bed rails for damage, rust, or irregularities that might prevent proper clamp installation. Small dents or scratches won’t affect installation, but significant damage or aftermarket modifications may require additional hardware or professional installation. Clean the bed rails thoroughly with soap and water, removing all dirt, grease, and debris that could prevent secure clamp attachment.
Required Tools and Materials
The BAKFlip G2 installation requires minimal tools that most truck owners already possess. You’ll need a socket wrench set with both metric and SAE sockets, adjustable wrench, Phillips and flathead screwdrivers, and a rubber mallet for seating components without damage. A torque wrench helps achieve proper clamp tightness, though careful hand-tightening works for experienced mechanics.
Keep a magnetic parts tray nearby during installation to prevent losing small hardware pieces. The installation includes springs, clips, and fasteners that easily disappear in truck beds or garage floors. Organize hardware by size and type as you unpack components to streamline the installation process.
Have cleaning supplies available including isopropyl alcohol and clean rags for surface preparation. Some installations require light lubrication of moving parts—white lithium grease or silicone spray works well for hinges and latching mechanisms. Avoid petroleum-based lubricants that can degrade rubber seals over time.
Unpacking and Component Identification
The BAKFlip G2 ships in a sturdy cardboard carton with foam padding protecting individual components. Carefully remove all packaging materials and lay components on a clean surface where you can identify each part according to the instruction manual. Take photos of the unpacking process in case you need reference images during installation.
Identify the four main panels, left and right side rails, hardware bag, and installation manual. The panels connect with heavy-duty hinges that allow folding action while maintaining weather sealing. Side rails include pre-installed clamps positioned for your specific truck model—don’t adjust these unless specifically instructed.
Check the hardware bag contents against the parts list in your manual. Missing or damaged components require immediate contact with your dealer or BAK Industries customer service. Don’t attempt installation with missing parts—this leads to poor performance and potential warranty issues. Most dealers expedite replacement hardware shipments for new installations.
Step-by-Step BAKFlip G2 Installation Process
The actual BAKFlip G2 installation follows a logical sequence that ensures proper fit and operation. Working systematically through each step prevents mistakes and reduces installation time. Most experienced installers complete the process in 30-45 minutes, while first-time installers should budget 60-90 minutes including preparation time.
Step 1: Side Rail Positioning and Alignment
Begin by placing the left side rail along your truck’s bed rail with clamps loosely positioned but not tightened. The rail should sit flush against the bed rail surface with no gaps or misalignment. Pre-installed clamp spacing matches your truck’s bed rail configuration, but fine adjustment may be necessary for perfect alignment.
Position the rail so the front end aligns with your truck’s bulkhead or bed rail starting point. Most installations place the rail’s front edge 1-2 inches behind the bulkhead to prevent interference with closing the tailgate or bed access. The rear of the rail should extend nearly to the tailgate without preventing full tailgate operation.
Check that clamps align with solid portions of your bed rail and don’t interfere with drain holes, stake pockets, or tie-down points. Some truck models require specific clamp positioning to avoid these features. Your installation manual includes truck-specific diagrams showing optimal clamp placement for your vehicle.
Step 2: Initial Clamp Installation
With the left rail properly positioned, begin hand-tightening the clamps starting from the center and working toward both ends. This sequence ensures even pressure distribution and prevents rail warping during installation. Tighten clamps snugly but don’t fully torque them yet—final tightening comes after both rails are positioned.
Install the right side rail using the same process, ensuring both rails are parallel and level with each other. Measure the distance between rails at the front, center, and rear positions—these measurements should be identical within 1/8 inch. Uneven rail spacing causes panel binding and poor weather sealing.
Double-check that both rails sit flat against the bed rails with no rocking or gaps. Uneven contact indicates debris under the rails or bed rail damage that needs addressing. Clean contact surfaces again if necessary and verify that clamps don’t interfere with truck bed features.
Step 3: Panel Assembly and Installation
The BAKFlip G2 panels arrive pre-assembled with hinges connecting all four sections. Carefully lift the complete panel assembly and position it over the installed side rails. The panels should rest evenly on both rails without forcing or binding. If panels don’t sit properly, recheck rail alignment and spacing.
Secure the panels to the side rails using the provided mounting hardware. The connection points along each rail accept specific bolts that attach through the panel frame into threaded inserts in the rail system. Hand-thread all bolts before tightening any to ensure proper alignment across all connection points.
Test the folding action after initial panel attachment but before final tightening. Panels should fold smoothly without binding or excessive force required. Stiff operation usually indicates misaligned rails or over-tightened panel connections. Adjust as necessary before proceeding to final torque specifications.
Step 4: Latch and Seal Installation
Install the automatic latching mechanisms at the rear of the cover according to your truck’s specific tailgate configuration. The G2 uses spring-loaded latches that engage automatically when panels close, providing security without manual locking. Position latches so they align with the tailgate’s top edge when closed.
Apply the provided rubber sealing strips around the perimeter of the rail system. These self-adhesive seals create weatherproof barriers that keep rain, snow, and dust out of your truck bed. Clean rail surfaces with alcohol before applying seals to ensure proper adhesion and longevity.
Install any drainage components included with your specific truck application. Some installations include drain tubes that direct water away from cargo areas. These small components play crucial roles in maintaining weatherproof protection and preventing water accumulation in truck bed channels.
Step 5: Final Adjustment and Torque Specifications
With all components installed, perform final torque tightening of all clamps and panel connections. BAK Industries specifies torque values in the installation manual—follow these exactly to prevent over-tightening that can crack rails or under-tightening that allows movement and leaks. Use a torque wrench for critical connections.
Test the complete operational cycle including opening, folding, closing, and latching. The cover should operate smoothly through all positions without binding, excessive force, or misalignment. Pay particular attention to the automatic latching engagement—latches should catch reliably with gentle closing pressure.
Perform a water test if possible by spraying the closed cover with a garden hose. Water should run off the cover and out through designated drainage points without entering the truck bed. Minor seepage during initial testing often resolves as seals compress and settle into position.
Truck-Specific BAKFlip G2 Installation Considerations
While the basic BAKFlip G2 installation process remains consistent across truck models, specific vehicles require unique considerations for optimal performance. Understanding these model-specific requirements prevents installation problems and ensures proper operation tailored to your truck’s design.
Ford F-150 Installation Notes
F-150 installations require attention to the boxlink system and integrated tie-downs that may interfere with clamp placement. Newer F-150s with the tailgate step feature need specific latch positioning to maintain step operation. The aluminum bed construction on recent models requires careful torque control to prevent damage during clamp installation.
F-150 models with spray-in bed liners may need longer clamp bolts to accommodate liner thickness. Check your hardware kit for extended bolts or contact your dealer if standard hardware doesn’t provide adequate engagement. Some bed liner textures require additional cleaning before seal installation for proper adhesion.
The F-150’s tailgate dampening system affects latch positioning and operation. Ensure latches don’t interfere with dampeners or prevent full tailgate opening. Test tailgate operation through its complete range after installation to verify clearance and proper function.
Chevrolet Silverado and GMC Sierra Specifics
Silverado and Sierra installations must accommodate the CornerStep rear bumper and integrated tailgate handle designs. Clamp positioning requires careful attention to bed rail drainage channels that differ from other manufacturers. The tie-down system configuration affects seal placement and drainage patterns.
These trucks often include bed rail protectors that must be removed before installation. The protectors interfere with clamp seating and prevent proper rail contact. Save the protectors for potential reinstallation if you remove the cover in the future. Clean adhesive residue thoroughly before proceeding with installation.
Silverado models with the MultiPro tailgate system require specific latch adjustments to maintain all tailgate functions. Test each tailgate position after installation to ensure the cover doesn’t restrict any MultiPro features. Some adjustments may be necessary for optimal compatibility with advanced tailgate systems.
RAM 1500 Installation Unique Requirements
RAM 1500 installations contend with the RamBox cargo management system on equipped models. RamBox trucks require special installation procedures and may need additional hardware to accommodate the side-mounted storage compartments. Standard G2 installations don’t fit RamBox configurations without modifications.
The RAM’s dual-action tailgate affects latch positioning and requires specific adjustment procedures. Both swing-out and drop-down tailgate functions must operate properly after cover installation. Test both tailgate positions and adjust latches as necessary for clearance and proper engagement.
RAM models often include factory bed dividers and cargo tie-down tracks that influence rail placement and seal installation. Work around these features carefully to maintain their functionality while achieving proper cover operation. Some tie-down points may require temporary removal during installation.
Toyota Tundra Special Considerations
Tundra installations require attention to the integrated bed tie-down system and unique bed rail profile. The bed construction differs significantly from domestic manufacturers and may require Tundra-specific hardware for proper clamp engagement. Verify your kit includes the correct components for Tundra applications.
The Tundra’s tailgate assist mechanism and integrated spoiler affect latch positioning and operational clearances. Ensure latches don’t interfere with the assist system or prevent proper tailgate sealing against the spoiler. Test tailgate operation throughout its range after latch installation.
Some Tundra bed configurations include factory bed mats or rubber liners that affect clamp installation. These may need trimming or modification for proper rail seating. The unique bed rail shape requires careful attention to clamp positioning for optimal holding power and weather sealing.
Common BAKFlip G2 Installation Challenges and Solutions
Even experienced installers encounter challenges during BAKFlip G2 installation that require troubleshooting and creative solutions. Understanding common problems and their remedies helps you complete installation successfully without delays or professional assistance.
Panel Alignment and Binding Issues
Panel binding during folding operations usually indicates misaligned side rails or uneven rail spacing. Measure the distance between rails at multiple points to identify alignment problems. Rails that aren’t parallel cause panels to bind as they fold, creating excessive stress on hinges and potential damage.
Loosen all clamps and reposition the problematic rail to achieve parallel alignment with proper spacing. Use measuring tape or a straight board to verify consistent spacing from front to rear. Tighten clamps gradually while checking alignment to prevent rails from shifting during the tightening process.
Sometimes binding results from over-tightened panel connections that compress gaskets excessively. Loosen panel mounting bolts slightly to allow natural gasket compression without creating binding. The panels should fold smoothly with moderate effort—excessive force indicates adjustment needs.
Latching Mechanism Problems
Automatic latches that don’t engage properly usually suffer from misalignment or interference with tailgate components. Adjust latch position so engagement occurs naturally when panels close with normal pressure. Latches shouldn’t require excessive force or precise positioning to engage reliably.
Check for interference between latches and tailgate hardware including handles, dampeners, or step mechanisms. Small adjustments in latch position often resolve interference issues while maintaining proper engagement. Test latching operation with the tailgate in various positions to ensure consistent function.
Spring tension in the latching mechanism may need adjustment if latches feel too loose or too tight. Most latches include adjustment screws that modify spring preload for optimal engagement force. Follow manual instructions for proper adjustment procedures specific to your latch design.
Sealing and Weather Protection Issues
Water leaks through a properly installed G2 usually indicate seal placement problems or contaminated mounting surfaces. Remove leaking seals, clean mounting surfaces with alcohol, and reinstall with proper adhesion. Press seals firmly into place and allow 24 hours for full adhesive cure before testing.
Gaps between panels and rails often result from insufficient rail-to-bed contact or uneven bed rail surfaces. Add shims between rails and bed rails if necessary to achieve uniform contact. Some installations benefit from additional sealant applied sparingly to critical joint areas.
Poor drainage during heavy rain indicates blocked drainage channels or improper drain tube installation. Clear all debris from rail drainage channels and verify drain tubes direct water away from cargo areas. Some installations require repositioning drain outlets for effective water management.
Hardware and Fitment Problems
Missing or damaged hardware requires immediate replacement before proceeding with installation. Don’t substitute hardware from other sources—BAK Industries hardware is specifically engineered for the loads and environmental conditions tonneau covers experience. Contact your dealer or BAK directly for replacement components.
Clamps that don’t fit your bed rail profile properly may indicate you received the wrong installation kit for your truck. Double-check your truck’s specifications against the kit label and contact your dealer if discrepancies exist. Forcing incompatible hardware leads to damage and poor performance.
Stripped threads in clamp assemblies usually result from over-tightening during installation. Use proper torque specifications and avoid impact tools that can exceed safe tightening limits. Damaged threads require component replacement—thread repair compounds don’t provide adequate strength for tonneau cover applications.
Post-Installation Testing and Break-In Period
Completing the BAKFlip G2 installation marks the beginning of a break-in period where components settle into their operational positions and seals achieve optimal compression. Understanding this process helps you identify normal settling versus installation problems requiring attention.
Initial Operation Testing
Immediately after installation, test all operational functions including panel folding, latching engagement, and tailgate operation. The cover should fold smoothly without binding, though initial operation may feel slightly stiff as new components break in. Automatic latches should engage reliably with moderate closing pressure.
Verify that tailgate operation remains unimpeded throughout its full range of motion. Check both opening and closing action, paying attention to any interference with latch mechanisms or cover components. Some adjustments may be necessary after initial testing reveals operational conflicts.
Test the cover in various weather conditions if possible. Rain provides the ultimate test of weather sealing and drainage effectiveness. Light seepage during initial rain exposure often resolves as seals compress and achieve full contact. Significant leaks require immediate investigation and correction.
First Week Monitoring
During the first week after installation, monitor all functions daily to catch any problems before they cause damage. Pay attention to changes in folding effort, latch engagement quality, or unusual noises during operation. Early detection allows easy correction of minor issues.
Check clamp tightness after the first few days of operation. Initial settling may require retightening of clamps and panel connections as components seat into their final positions. This is normal and expected—don’t consider it an installation problem unless loosening continues beyond the first week.
Inspect seals for proper adhesion and compression after several operational cycles. Seals should remain firmly attached without lifting edges or gaps developing. Poor initial adhesion often indicates contaminated mounting surfaces that need cleaning and seal reinstallation.
30-Day Follow-Up Inspection
After 30 days of operation, perform a comprehensive inspection of all installation components. This timing allows complete break-in while catching any developing problems early. Most warranty issues appear within the first month if installation problems exist.
Retighten all fasteners to specification after the break-in period. Component settling and thermal cycling can reduce fastener tension during the first month of operation. This maintenance prevents loose components from causing damage or operational problems.
Document the cover’s performance with photos and notes about operation, weather sealing, and any minor issues discovered. This documentation proves valuable for warranty claims and helps establish maintenance schedules for optimal longevity. Most covers require minimal maintenance when properly installed and broken in.
Maintenance Schedule After BAKFlip G2 Installation
Proper maintenance following BAKFlip G2 installation ensures years of reliable service and maintains warranty coverage. Developing consistent maintenance habits prevents minor issues from becoming expensive repairs while preserving the cover’s appearance and functionality.
Weekly Maintenance Tasks
Visual inspection during routine vehicle checks catches problems early when solutions remain simple and inexpensive. Look for loose components, damaged seals, or changes in operational feel that indicate developing issues. Address minor problems immediately to prevent escalation into major repairs.
Clean debris from panel gaps and drainage channels weekly during heavy use periods. Accumulated dirt acts like sandpaper against moving parts and accelerates wear on seals and hinges. A quick rinse with the garden hose prevents buildup that causes operational problems.
Test latch engagement weekly to ensure consistent operation. Latches should engage automatically with normal closing pressure and release smoothly when panels open. Changes in latch feel indicate adjustment needs or component wear requiring attention.
Monthly Deep Maintenance
Wash the entire cover monthly with mild car soap and water, paying attention to panel joints, hinge areas, and seal interfaces. Thorough cleaning removes corrosive contaminants and prevents buildup that degrades components over time. Rinse completely and allow thorough drying before closing the cover.
Lubricate all moving parts with appropriate lubricants. Use silicone spray on rubber seals to maintain flexibility and compression characteristics. Apply dry lubricant to latch mechanisms and hinge pivots to prevent corrosion and maintain smooth operation. Avoid petroleum-based products that degrade rubber components.
Check and retighten all fasteners monthly during the first six months of operation. Seasonal temperature changes cause thermal expansion and contraction that can affect fastener tension. Maintaining proper tightness prevents component movement and extends service life.
Seasonal Maintenance Requirements
Before winter weather, apply UV protectant to all exposed surfaces and verify that drainage systems function properly. Winter conditions stress tonneau covers through temperature extremes, ice loading, and moisture exposure. Proper preparation prevents damage and maintains operation through harsh conditions.
Spring maintenance includes thorough inspection for winter damage and replacement of worn consumable items like seals or latching components. Document any changes in appearance or operation that might indicate warranty-covered issues. Address problems promptly to prevent seasonal damage from affecting summer operation.
Summer preparation focuses on UV protection and heat management. Extreme temperatures stress materials and accelerate component aging. Additional UV protectant application and increased inspection frequency help identify heat-related problems before they cause failures. Consider parking in shade when possible to reduce thermal stress on components.
Frequently Asked Questions
How long does BAKFlip G2 installation typically take?
Most BAKFlip G2 installations take 30-60 minutes for experienced installers, while first-time installations may require 60-90 minutes including preparation time. The no-drill design simplifies installation significantly compared to covers requiring bed modifications. Taking time for proper alignment and adjustment ensures optimal long-term performance.
Can I install the BAKFlip G2 myself without professional help?
Yes, the BAKFlip G2 installation is designed for DIY completion using basic hand tools and following included instructions. The no-drill clamp system eliminates complex modifications while providing secure attachment. Most truck owners with moderate mechanical skills successfully complete installation without professional assistance.
What tools are required for BAKFlip G2 installation?
Installation requires basic hand tools including socket wrench set, adjustable wrench, screwdrivers, and rubber mallet. A torque wrench helps achieve proper fastener tightness, though experienced mechanics can hand-tighten successfully. Most installations use tools commonly found in home workshops or basic automotive tool sets.
Will BAKFlip G2 installation affect my truck’s warranty?
The no-drill installation preserves truck bed warranty coverage since no permanent modifications are required. Clamp-on attachment allows complete removal without affecting the truck’s original condition. However, verify with your dealer if you have concerns about warranty implications specific to your truck model.
Can I remove the BAKFlip G2 after installation?
Yes, the clamp-on design allows complete removal by reversing the installation process. Removal typically takes 15-30 minutes and leaves no permanent modifications to your truck bed. This makes the G2 ideal for lease vehicles or owners who may want different bed configurations in the future.
What if my truck has a spray-in bed liner?
Most spray-in bed liners are compatible with BAKFlip G2 installation. Some thick liners may require longer clamp bolts included in truck-specific hardware kits. Textured liner surfaces may need additional cleaning before seal installation for proper adhesion. Contact your dealer if you’re unsure about liner compatibility.
How do I know if my installation was successful?
Successful installation results in smooth folding operation, automatic latch engagement, and effective weather sealing. The cover should operate without binding or excessive force required. Test with water spray to verify weatherproofing and ensure tailgate operation remains unimpeded throughout its full range of motion.
What should I do if panels don’t align properly?
Panel misalignment usually indicates incorrect side rail spacing or positioning. Loosen all clamps and reposition rails for parallel alignment with consistent spacing. Measure between rails at multiple points to verify uniform distances. Proper rail alignment ensures smooth panel operation and optimal weather sealing performance.