BAKFlip MX4 F-150 Installation Guide | Complete Step-by-Step Instructions
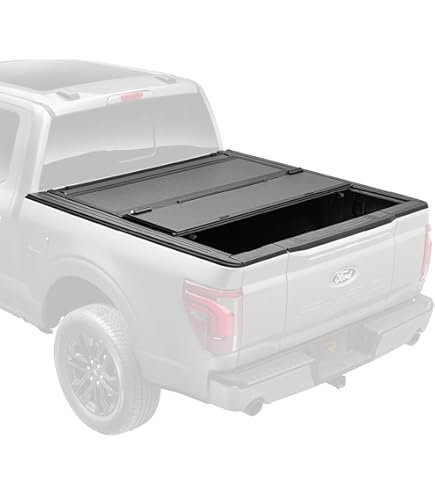
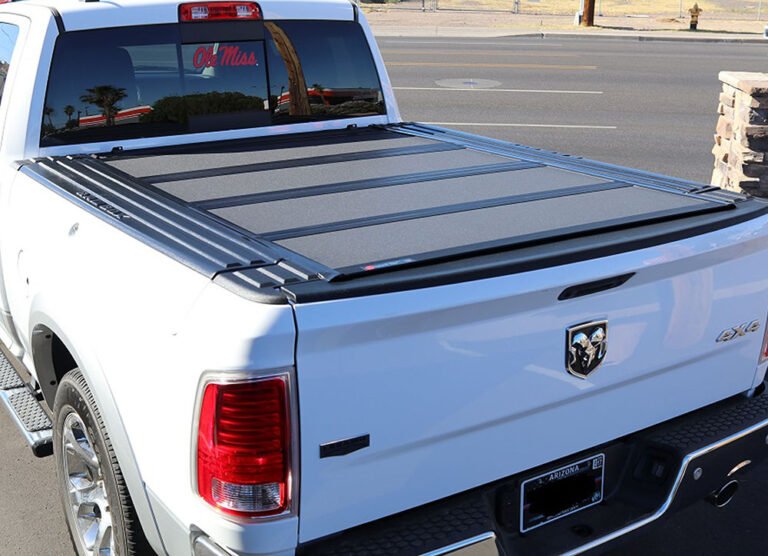
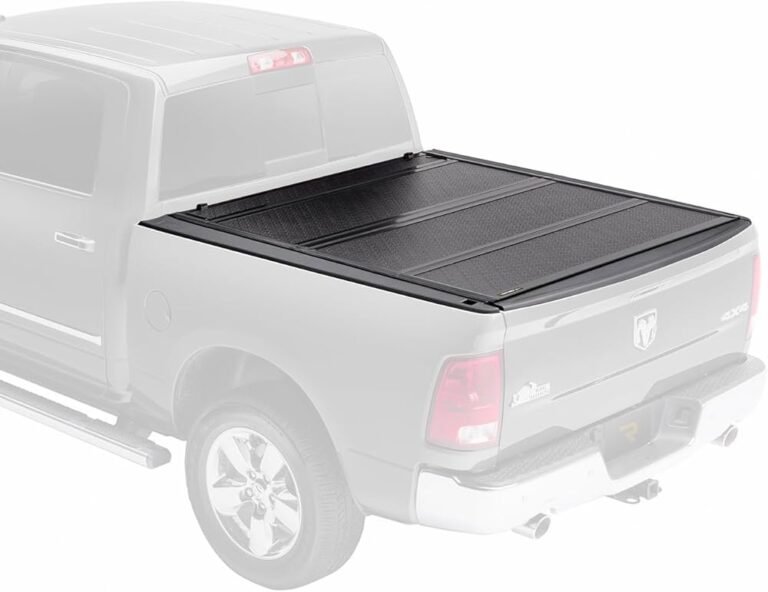
BAKFlip MX4 Tonneau Cover for Ford F-150
The BAKFlip MX4 F-150 provides premium aluminum construction with no-drill installation that maintains your truck’s resale value. Features four-panel folding design for complete cargo access while delivering weatherproof protection. Premium matte finish resists scratches and UV fading. Compatible with 5.5ft, 6.5ft, and 8ft F-150 bed lengths including SuperCrew and SuperCab models. Installation takes 30-45 minutes with basic hand tools and included rail-mounted clamp system. Automatic latching ensures security without manual locking steps.
Pre-Installation Preparation for BAKFlip MX4 F150
Proper preparation ensures smooth BAKFlip MX4 F150 installation and prevents common mistakes that create problems later. Start by thoroughly cleaning your truck bed to remove dirt, debris, and any existing accessories that might interfere with rail placement. Even small particles trapped under rails can cause gaps that compromise sealing or create pressure points leading to damage.
Verify your F-150 bed dimensions match the cover specifications before beginning installation. Measure from inside the bulkhead to inside the tailgate for accurate length determination. The BAKFlip MX4 comes in three F-150 configurations: 5.5ft for SuperCrew models, 6.5ft for most SuperCab and SuperCrew variants, and 8ft for Regular Cab long beds. Installing the wrong size creates sealing problems and operational issues.
Check for bed liner compatibility since some spray-in liners create thickness that affects rail fitment. Drop-in bed liners typically require removal for proper installation. The clamp system needs direct contact with metal bed rails to achieve proper torque specifications and secure mounting. Thick bed liners prevent adequate clamping pressure and may cause the cover to shift during operation.
Required Tools and Materials
Gather all necessary tools before starting your BAKFlip MX4 F150 install to avoid interruptions during critical assembly steps. The basic tool list includes a socket wrench set with both metric and SAE sockets, Phillips and flathead screwdrivers, and a rubber mallet for gentle persuasion. A magnetic parts tray keeps small hardware organized during installation.
Most importantly, you’ll need a torque wrench for proper clamp tightening. BAK Industries specifies exact torque values that prevent over-tightening damage while ensuring secure mounting. Under-tightened clamps allow movement that causes wear and potential failure. Over-tightened clamps can crack bed rails or damage the cover’s mounting system.
Have isopropyl alcohol and clean rags available for final surface preparation before installing seals. This removes any remaining residue that prevents proper adhesion. Silicone spray lubricant helps with initial seal placement and protects rubber components during installation.
Workspace Setup
Choose a level work area with adequate space around your F-150 for maneuvering panels and accessing both sides of the truck bed. Uneven surfaces make alignment difficult and may cause binding during initial operation. Indoor installation protects from wind that makes panel handling difficult and prevents debris from contaminating clean surfaces.
Remove or secure any loose items from your truck bed including toolboxes, tie-downs, or cargo organizers. These items complicate rail placement and may interfere with proper fitment. Some accessories are compatible with the MX4 but require specific positioning relative to the rail system.
Temperature considerations affect installation success. Ideal installation temperature ranges from 50-80°F when seals remain flexible and adhesives cure properly. Cold weather makes seals stiff and difficult to position correctly. Hot weather can make handling aluminum panels uncomfortable and may affect adhesive working time.
Step-by-Step BAKFlip MX4 Installation Process
The tonneau cover BAKFlip MX4 F150 installation follows a logical sequence that builds from foundation to completion. Each step depends on proper completion of previous steps, making careful attention to detail crucial throughout the process.
Step 1: Rail System Installation
Begin installation by positioning the side rails along your F-150’s bed rails. The rails feature integrated drainage channels that must face toward the bed interior to direct water away from cargo. Incorrect orientation causes water pooling and potential leaks into the bed.
The clamp spacing follows specific patterns detailed in the installation manual. Typically, clamps position every 18-24 inches depending on your F-150’s bed length. This spacing provides adequate support while avoiding interference with existing bed features like stake pocket holes or tie-down points.
Hand-tighten all clamps first to ensure proper alignment before final torquing. This allows minor adjustments as you work along the rail length. Check that rails sit flush against the bed rails without gaps or misalignment. Rails must be perfectly parallel for proper panel operation and weather sealing.
Apply the specified torque values using your torque wrench in a sequence that prevents warping. Start with center clamps and work toward the ends, tightening in 50% increments until reaching final specification. This gradual approach ensures even pressure distribution and prevents stress concentrations.
Step 2: Seal Installation
The perimeter seal system creates weatherproof closure when panels are locked down. These seals require careful positioning for proper compression and water exclusion. Clean all surfaces with isopropyl alcohol before removing seal backing paper to ensure maximum adhesion.
Start seal installation at one corner and work systematically around the perimeter. The seals come pre-cut to exact lengths for your specific F-150 bed size. Avoid stretching seals during installation since this creates thin spots that fail prematurely. Press firmly but don’t compress seals completely during initial placement.
Pay special attention to corner transitions where seals meet at 90-degree angles. These joints require careful alignment to prevent gaps where water might penetrate. Some installers add a small dab of silicone sealant at corners for extra protection, though this isn’t typically necessary with proper installation.
Step 3: Panel Assembly and Alignment
Panel installation requires careful handling to prevent damage to the aluminum surface or internal foam core. The panels arrive pre-assembled with hinges, so your job focuses on proper alignment and adjustment rather than component assembly.
Position the complete panel assembly onto the installed rail system, ensuring hinge pins align with their mounting points. The weight of four aluminum panels makes this a two-person job for most installers. Support panels adequately to prevent stress on hinges during initial positioning.
Check panel alignment by folding and unfolding the cover several times. Panels should move smoothly without binding or requiring excessive force. Misalignment creates wear points that cause premature failure and operational problems. Minor adjustments through rail repositioning correct most alignment issues.
Verify that latching mechanisms engage properly when panels close. The automatic latches should click into place with gentle downward pressure. Latches requiring excessive force indicate alignment problems or seal compression issues that need correction before completing installation.
Step 4: Final Adjustments and Testing
Complete your install BAKFlip MX4 F150 project with comprehensive testing and final adjustments. Operate the cover through multiple open and close cycles, checking for smooth operation and proper latching. Each panel should fold completely flat against the cab or previous panel without gaps or misalignment.
Test weather sealing by spraying water over the closed cover and checking for leaks into the bed. Focus attention on perimeter seals, corner joints, and panel-to-panel interfaces. Minor leaks often resolve after initial compression cycling as seals conform to their mounting surfaces.
Check clearance around tailgate operation ensuring the cover doesn’t interfere with normal tailgate function. Some F-150 configurations require minor adjustments to prevent contact during tailgate opening. The cover should provide adequate clearance for all normal truck operations.
Document your installation with photos and notes for future reference. Record torque specifications used, any adjustments made, and installation date for warranty purposes. Keep all documentation with your vehicle records for future maintenance or warranty claims.
Common Installation Challenges and Solutions
Even experienced installers encounter challenges during BAKFlip MX4 F150 6.5 installation. Understanding common problems and their solutions prevents frustration and ensures successful completion.
Rail Alignment Issues
Misaligned rails cause panel binding and operational problems that worsen over time. This usually results from rushing the rail installation process or inadequate attention to parallel alignment. Check rail alignment using a measuring tape between rails at multiple points along their length.
Correction requires loosening all clamps and repositioning rails for parallel alignment. Use the truck’s bed rail edges as reference points since they’re manufactured to tight tolerances. Some installers create alignment jigs using scrap wood to maintain consistent spacing during clamp tightening.
Bed rail variations between F-150 model years sometimes create fitment challenges. Older trucks may have slightly different rail profiles that affect clamp seating. These issues usually resolve with careful clamp positioning and may require consultation with BAK Industries for specific model guidance.
Seal Compression Problems
Inadequate seal compression allows water intrusion and wind noise that defeats the cover’s primary purposes. This often stems from incorrect seal installation or alignment problems that prevent proper panel closure. Check that seals aren’t twisted or folded during installation.
Over-compressed seals create excessive closing force and premature wear. The correct compression allows smooth closing while maintaining weather sealing. Seals should compress approximately 30-40% when panels close completely. More compression indicates installation problems requiring correction.
Temperature affects seal performance significantly. Cold weather installation may result in seals that seem too stiff initially but soften as temperatures rise. Conversely, hot weather installation may create seals that seem perfect initially but lose compression as temperatures drop.
Latch Adjustment Difficulties
Latching problems frustrate installers and owners alike when panels won’t stay closed securely. Latch mechanisms require precise alignment to engage properly without excessive force. Most latch problems trace to panel alignment issues rather than defective hardware.
Check that panels sit level when closed before adjusting latch mechanisms. Twisted or warped panels prevent proper latch engagement regardless of adjustment attempts. Sometimes minor rail repositioning corrects panel alignment enough to resolve latch problems.
Latch spring tension affects engagement force and security. New latches may feel stiff initially but break in after several operation cycles. Avoid over-adjusting new latches that haven’t completed their break-in period. Most latch problems resolve within the first week of normal operation.
BAKFlip MX4 F150 6.5 Specific Considerations
The 6.5-foot F-150 bed length represents the most popular configuration, fitting both SuperCrew and many SuperCab models. This bed size offers optimal balance between cargo capacity and vehicle maneuverability, making it the default choice for many F-150 buyers.
Installation on 6.5ft beds follows standard procedures but benefits from specific tips that address this configuration’s unique aspects. The panel proportions work perfectly with this bed length, creating balanced appearance and optimal functionality. Each panel measures approximately 19 inches when folded, allowing complete cargo access when needed.
SuperCrew models with 6.5ft beds sometimes have different bed rail configurations than SuperCab models with the same bed length. These variations rarely affect installation but may require minor clamp positioning adjustments. Always verify your specific model year and cab configuration when ordering components.
SuperCrew vs SuperCab Differences
SuperCrew F-150s with 6.5ft beds feature integrated bed rail systems that provide excellent mounting points for BAKFlip clamps. The rails typically offer more mounting options than SuperCab configurations, allowing installers flexibility in clamp positioning.
SuperCab models may have simpler bed rail designs that require more precise clamp placement. These trucks often have fewer stake pocket holes or tie-down points that might interfere with rail installation. The simplified bed design actually makes installation easier in many cases.
Both configurations achieve identical performance once installation is complete. The cover operates identically regardless of cab style, providing the same weather protection, security, and functionality. Choose based on your truck’s configuration rather than perceived performance differences.
Payload and Towing Considerations
The MX4’s lightweight aluminum construction adds minimal weight to your F-150’s payload capacity. The complete cover weighs approximately 65-75 pounds depending on bed length, representing less than 2% of most F-150 payload ratings. This minimal impact preserves your truck’s hauling and towing capabilities.
Towing with the cover installed creates no aerodynamic or structural concerns. The low-profile design maintains airflow over the truck bed while providing secure cargo protection. Many owners report improved fuel economy when towing with the cover closed compared to open bed configurations.
Heavy cargo loads may affect cover operation if items contact the underside of panels. Distribute weight evenly and avoid stacking cargo higher than bed rail level when possible. The cover handles normal cargo loads without problems but isn’t designed to support additional weight on top of closed panels.
Post-Installation Break-In and Maintenance
Your newly installed tonneau cover BAKFlip MX4 F150 requires a brief break-in period for optimal performance. Components need time to seat properly and adjust to your specific installation conditions.
Initial Break-In Period
Operate your cover 10-15 times during the first week to allow seals to conform and moving parts to wear in properly. Initial operation may feel slightly stiff as new components adjust to their operating environment. This is normal and improves quickly with use.
Avoid forcing panels during break-in if they seem to bind slightly. Gentle operation allows components to adjust naturally without damage. Most stiffness resolves within the first few operation cycles as seals compress and lubricants distribute properly.
Monitor latch operation during break-in since spring tensions may require minor adjustment as components settle. Latches that initially require significant force often ease considerably after break-in. Document any persistent problems for follow-up adjustment after the break-in period.
Long-Term Maintenance Schedule
Establish a regular maintenance routine to preserve your investment and ensure continued reliable operation. Monthly visual inspections catch problems before they become expensive repairs. Check seal condition, latch operation, and general cleanliness during routine vehicle maintenance.
Clean your cover every 4-6 weeks with mild car soap and water. Avoid pressure washing directly on seals to prevent adhesive damage. Accumulated dirt acts like sandpaper, accelerating wear on moving parts and sealing surfaces.
Lubricate hinges and latches quarterly with appropriate lubricants. Silicone spray works well for seals while dry lubricant suits latching mechanisms. Avoid petroleum-based products that may damage rubber components or attract dirt that accelerates wear.
Troubleshooting Common Operational Issues
Understanding how to diagnose and correct common problems keeps your BAKFlip MX4 operating reliably for years. Most issues stem from installation variations or normal wear rather than manufacturing defects.
Water Leaks
Water intrusion typically indicates seal compression problems or alignment issues that prevent proper closure. Start troubleshooting by checking perimeter seal condition and compression. Worn or damaged seals allow water penetration that worsens over time.
Panel alignment affects sealing since misaligned panels create gaps where water enters. Check that panels close evenly without high spots or gaps. Minor alignment adjustments often resolve leak problems without component replacement.
Drainage system blockages cause water backup that may appear as leaks. Clean drainage channels in side rails regularly to prevent debris accumulation. Blocked drains create water pressure that forces moisture past normally adequate seals.
Difficult Opening or Closing
Binding panels indicate alignment problems, worn hinges, or inadequate lubrication. Check panel alignment first since this causes most operational difficulties. Misaligned panels create friction points that worsen over time and may damage components.
Hinge lubrication affects operation smoothness significantly. Apply appropriate lubricant to hinge points quarterly or whenever operation becomes noticeably stiffer. Use lubricants designed for outdoor equipment that won’t attract dirt or wash away easily.
Seal interference sometimes causes difficult closing, especially in cold weather when seals become stiffer. Check seal positioning to ensure they don’t fold or bunch during closure. Properly positioned seals compress smoothly without creating excessive resistance.
Latch Problems
Latching difficulties usually stem from alignment issues rather than defective hardware. Check that panels sit level and properly positioned when attempting to latch. Twisted panels prevent proper latch engagement regardless of adjustment attempts.
Spring tension affects latch operation significantly. Weak springs don’t engage reliably while over-tensioned springs make opening difficult. Most latch adjustments involve spring tension modification through adjustment screws or spring replacement.
Dirt accumulation interferes with latch operation by preventing proper engagement or causing sticky operation. Clean latch mechanisms regularly and lubricate lightly to maintain smooth function. Heavy lubrication attracts dirt that worsens problems over time.
Warranty and Support Information
Your BAKFlip MX4 F150 installation includes comprehensive warranty coverage that protects your investment when properly maintained and operated. Understanding warranty terms helps you maximize coverage and obtain support when needed.
Warranty Coverage Details
BAK Industries provides 5-year limited warranty coverage on materials and workmanship from original purchase date. This covers manufacturing defects, material failures, and construction problems under normal use conditions. The warranty excludes normal wear items and damage from misuse or accidents.
Installation errors may void warranty coverage if they contribute to component failure. Professional installation provides additional protection since installers assume responsibility for proper fitment and initial adjustment. DIY installation doesn’t void warranty but may complicate failure analysis.
Document your installation with photos and detailed notes for warranty purposes. Include installation date, tools used, torque specifications applied, and any unusual conditions encountered. This documentation supports warranty claims if problems develop later.
Obtaining Technical Support
BAK Industries customer service provides installation support and troubleshooting assistance for both professional installers and DIY customers. Their technical staff understands common installation challenges and can provide guidance for specific situations.
When contacting support, have your cover’s serial number and truck specifications available. Include bed length, model year, and cab configuration for accurate assistance. Photos of installation problems help support staff diagnose issues remotely.
Many authorized dealers provide post-installation support for covers purchased through them. This local support often resolves minor adjustment needs more quickly than factory support. Establish relationships with knowledgeable local dealers for ongoing assistance.
Frequently Asked Questions
How long does BAKFlip MX4 F150 installation typically take?
Most installers complete BAKFlip MX4 F150 installation in 30-45 minutes with proper preparation and tools. First-time installers may need 60-90 minutes to ensure careful attention to alignment and adjustment details. Professional installation typically takes 30 minutes.
Can I install the MX4 without drilling holes in my F-150?
Yes, the BAKFlip MX4 uses a no-drill clamp system that secures to existing bed rails without permanent modifications. This preserves your truck’s resale value and allows complete removal if desired. The clamp system provides secure mounting equivalent to drilled installations.
Will the MX4 work with my F-150’s bed liner?
Spray-in bed liners are compatible with proper installation techniques. Drop-in bed liners typically require removal for adequate clamp engagement. Some thick spray-in liners may require longer clamp bolts available from BAK Industries.
What’s the difference between 6.5ft installation and other bed lengths?
Installation procedures remain identical regardless of bed length. The BAKFlip MX4 F150 6.5 represents the most common configuration with optimal panel proportions. Longer and shorter beds follow the same installation steps with appropriately sized components.
Can I adjust the cover if it doesn’t fit perfectly after installation?
Yes, minor adjustments are possible through rail repositioning and latch adjustment. Most fitment issues resolve with careful attention to alignment during installation. Major problems may indicate incorrect sizing or damaged components requiring replacement.
Do I need special tools for BAKFlip MX4 installation?
Basic hand tools handle most installation requirements. A torque wrench is essential for proper clamp tightening to prevent damage and ensure security. Socket wrenches, screwdrivers, and measuring tools complete the basic kit most truck owners already possess.
What should I do if panels don’t align properly after installation?
Panel misalignment usually indicates rail positioning problems requiring adjustment. Loosen rail clamps and check for parallel alignment using measurements between rails. Most alignment issues resolve with careful rail repositioning and proper torque application.
How do I know if my installation is covered by warranty?
DIY installation maintains warranty coverage when performed correctly according to instructions. Document your installation process and keep all receipts. Professional installation may provide additional protection but isn’t required for warranty validity.